

How to Use FRM
Resource Management
Resource management is the process of pre-planning, scheduling, and allocating your resources to maximize efficiency.
This is the process by which businesses manage their various resources effectively. Those resources can be intangible – people and time – and tangible – equipment, materials, and finances. It involves planning so that the right resources are assigned to the right tasks. Managing resources involves schedules and budgets for people, projects, equipment, and supplies.
Resource Entry Process
- Resource Need
- Purchase Approval – By Committee
- Purchase Order
- Material Received
- Resource Register Entry
Process Flow:
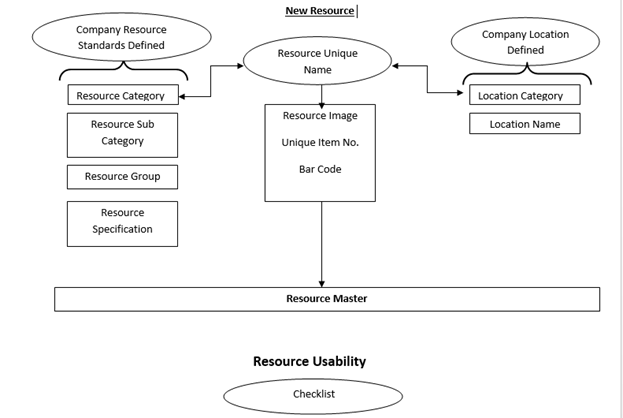
Resource Category:
This is used to:
1. List resource categories
2. Create new resource categories
3. Edit a resource categories
4. Delete (soft delete) resource categories
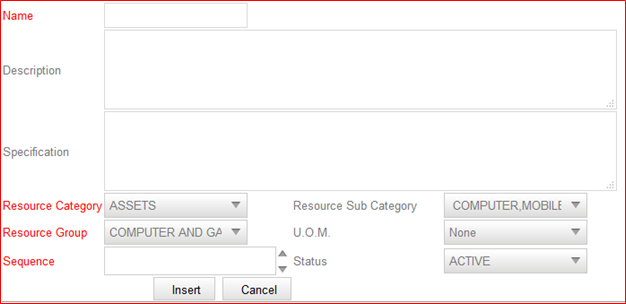
Using this form admin can create and store Resource Category. This form will be displayed to user only if permission to view resource categories, is provided for logged in user.
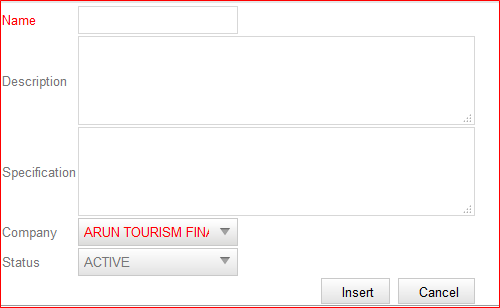
- Admin will enter the name of Resource Category first and will enter the description about that resource.
- Resource specification if available than that has to be entered there in Specification text box.
- Admin will select the company under which that resource belongs and finally he has to put that resource as Active category and finally he will insert that record.
Resource Sub Category:
This is used to:
1. List resource subcategories
2. Create new resource subcategories
3. Edit a resource subcategories
4. Delete (soft delete) resource subcategories
Using this form, admin will create sub category of resource under available resource.
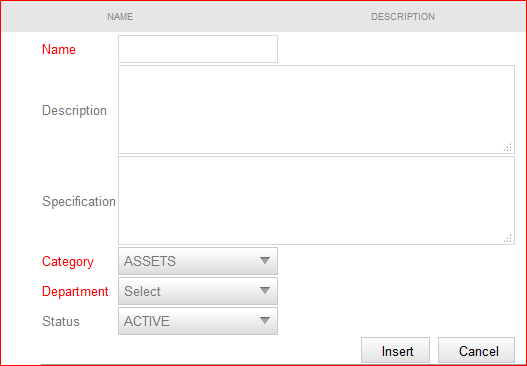
- Admin will enter the sub category name, its description and specification at given text boxes.
- Then admin will select the major category of resource under which that sub category comes.
- After this department has to be selected for which that particular resource belongs.
- Making this resource active, admin will click on insert button to insert and to save this record type.
Resource Group:
This is used to:
1. List resource groups
2. Create new resource groups
3. Edit a resource groups
4. Delete (soft delete) resource groups
Here, admin can define the owner of any particular resource under resource category and sub category.
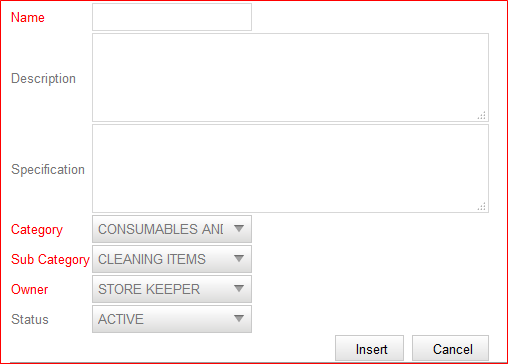
- Admin will enter Group name, Description and its specification inside the text boxes given.
- Admin will select the Resource category, Sub category and will select the owner from the drop down menu item.
- Admin click on Active button and insert the group name.
Resource item Name:
This form will be used to enter the available resource names based on category and sub category. Those resources are further available for allocation to employees.
- First admin will enter the name of resource along with its description and specification.
- Admin will select resource category and sub category from the given drop down menu item.
- Resource group will also be selected from the drop down.
- Admin will give the sequence number to that particular resource too and will make it active and click on insert button to save that record.
Resource Specification:
This is used to:
1. List resource specification groups
2. Create new resource specification groups
3. Edit a resource specification groups
4. Delete (soft delete) resource specification groups
Using this form, specification parameters can be defined by admin user.
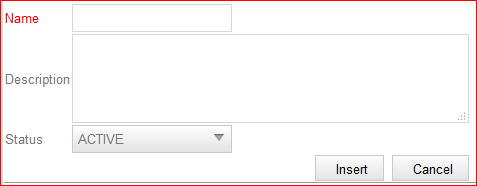
- At Name field use can define the parameter name /specification name as brand, color, dimension, life etc.
- User will enter the description and make this active to get this available in resource library.
Resource Item List:
This is used to:
1. List resource items
2. Create new resource items
3. Edit a resource items
4. Delete (soft delete) resource items
This is the major form, from where any resource full details have to maintain. User will define resource’s general details, purchase detail, risk factor and specification in this form.
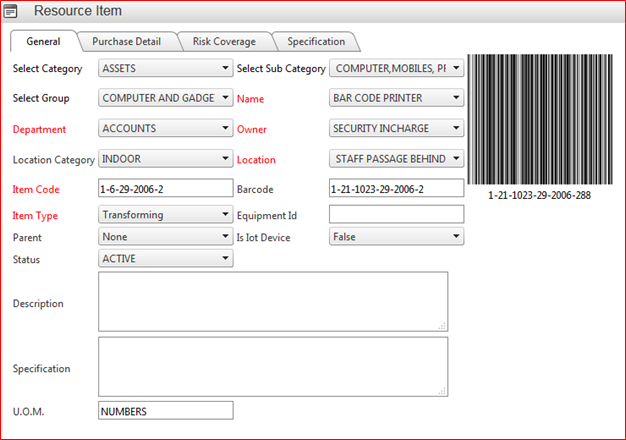
In general tab:
- First user will select category of resource from drop down than will select group, department, location, and resource’s sub category.
- User will enter the Item code and select the item type.
- User will select resource location and owner from the drop down menu too.
- Bar code and equipment ID will be entered by user here.
- Here, also user can define resource specification and its description and finally will click on save button to save this resource item.
Purchase Details:
Here user will enter the resource purchase details like invoice details, resource life etc.
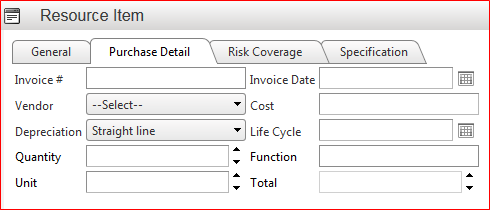
- User will enter the Invoice Number, Invoice date in this form
- User has to select the vendor from the drop down menu.
- Select the depreciation method against that particular resource, enter the quality purchased, units, and life cycle of that resource, its functions etc.
Risk cover:
- Here user need to provide resource’s risk factor like insurance details, insurance start and end date, risk type like insurance, AMC or warranty and cost need to pay against that cover.

Specification:
- In this tab user will enter the specification based on pre define parameters.
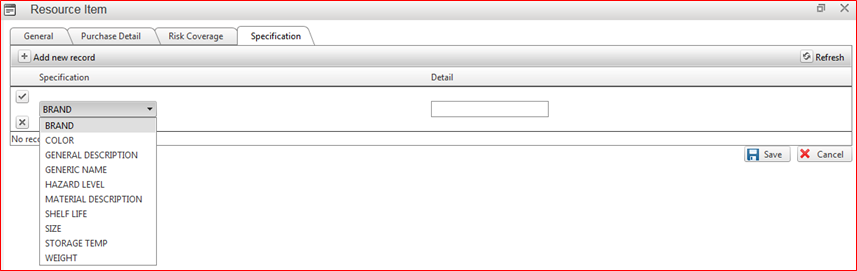
- User will select the parameter of specification from the drop down menu and enter the details against that specification parameter.
Resource Transfer:
- Using this form, user can transfer, update resource location and ownership.
- Here, first user need to select “Transfer own to” name from the drop down, this feature is locked by the password so here admin will need to enter password ‘for transfer’ to and ‘transfer by’ than he will click on continue option.
- On this form, admin will select the category, group item name, sub category of that particular resource he want to transfer.
- Based on given and searched resource, its current location, department will come automatically in the provided text boxes.
- Now admin can define its new location and select the new owner from the drop down menu and then click on Insert button to update this record and finally admin will click on Transfer button to transfer existing resource to new owner and new location.
How to Use HUMS
The HRMS is a complete suite that offers all the features required for creating and managing an efficient workforce but, the competitive world has a bigger challenge.
“To move the organizations from efficiency to effectiveness”
So that right people do the right thing not just people doing the right thing and this Gap is filled by Tip Top HUMS systems.
“To move the organizations from efficiency to effectiveness”
Performance Tool in terms of knowledge score, activity score and communication score directly linked to Promotions, Increments and Incentives.
MBO (Management By Objective) scores directly points to employee planning and execution capabilities.
The module has complete Performance appraisal suit.?
Appraisal Master:
Using this form admin can create and update Appraisal Library.
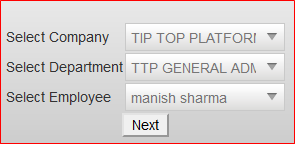
- Admin or HR will select the name of company and department under which particular employee reside whose appraisal needs to be opened.
- Once company and department selected, admin will select the employee name and click on Next button and this will open the form for creating his/ her appraisal.
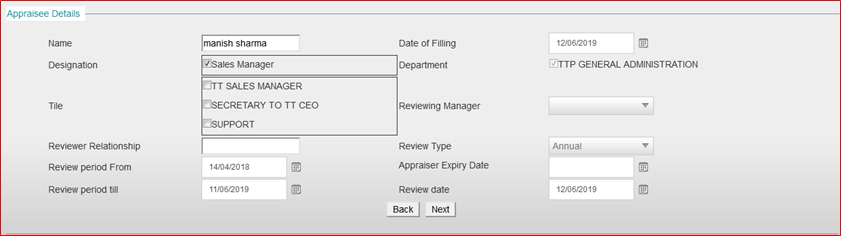
- In appraisal detail form, particular employee name and his associated designations and titles will be displayed as already linked with.
- Admin will enter the relationship of employee with Reviewer and select the review period from and till date. (Review period from date will be the joining date of employee or the date from last time reviewed)
- Date of appraisal details filling date will be displayed automatically and this will take current date.
- Department will also be displayed on this form.
- Reviewing manager name will be displayed in drop down menu and admin will select the name from the drown menu.
- Review type needs to be selected from drop down like annual, developmental, interim reviews, probationary etc.
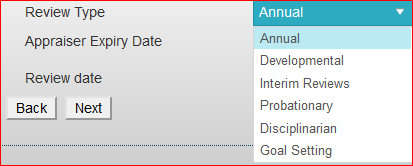
- Admin will also define appraisal expiry date and review date too. And click on Next button to redirect on next page of appraisal setup.
- On next page (Template Setup page) admin will get an option of setting up appraisal template. Pre-defined Templates will be displayed here (templates will be defined using control panel by the admin) and admin can select any pre-defined templets from the drop down menu.
- Once any template is selected from drop down menu, it will display the format to setup the template as per appraisal admin desire.
- Appraisal template groups will be displayed there along with key appraisal content like Discipline, communication, Achievements, defects, problems, team work, integrity, etc. In respective key contents admin will see the parameters as well with respect to key appraisal group names.

- In respective key appraisal contents, template will show start date, end date, defined Baseline, set targeted value, Maximum measure points etc.
- Admin can enter the weightage here based on organization policy or based on appraisal policies.
- After setting up weightage, appraisal admin will click on update and load template button given at the top of this page. And that template setup will be saved for appraisal for that particular employee.
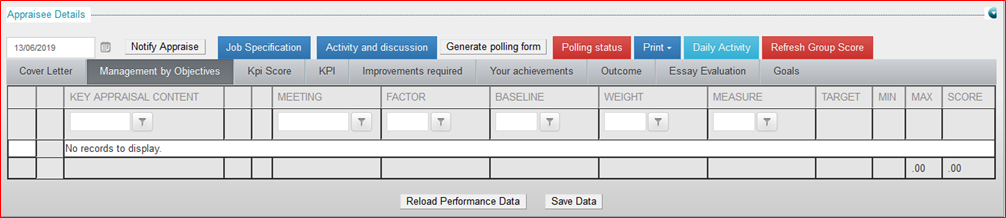
- Click on Job Specification button to see the job description of that employee.
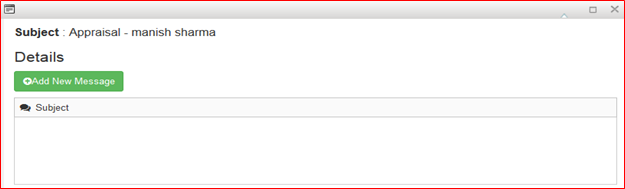
- Click on ‘Activity and discussion’ button if appraisal admin want to discuss anything related to appraisal with employee or respective supervisor etc.
- Once clicked on ‘Activity and discussion’ button it will open message form to send any message regarding appraisal.
- Click on ‘Daily Activity’ button to see the daily grooming report of employee submitted on regular basis.
- ‘Generate Polling Form’ button will generate the polling form to poll on defined parameters based on employees JD etc.
- Click on ‘Cover Letter’ button to generate the cover letter regarding employees’ appraisal generation.

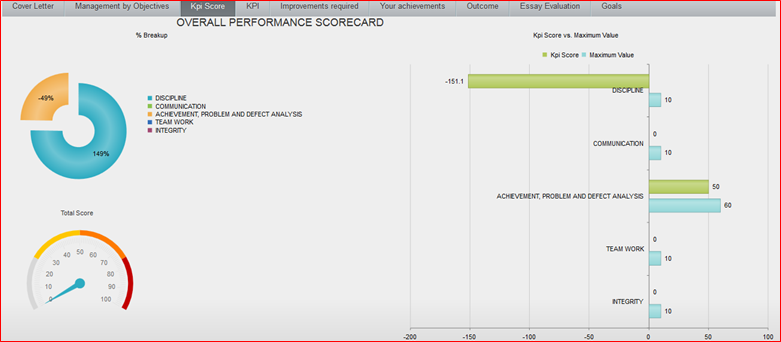
- Click on ‘KPI Score’ button and this will generate crore card in graphical format based on KPI’s.
- Click on ‘KPI’ button, this will display the KPI score based on per-defined KPI’s. Achieved and maximum scope will be shown on this form.
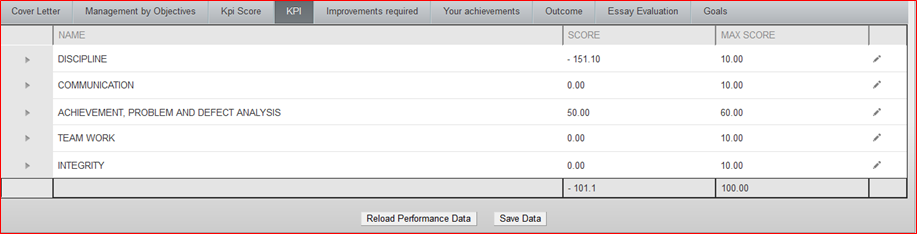
- Appraisal admin can edit this generated score by clicking on Edit button given at this form.
- Click on ‘Improvements required’ button, this will generate the form where the areas will be shown based on KPI’s where employee needs improvements based on KPI Score. Achieved score, maximum score, base line will be displayed here too.
- Click on ‘Your Achievements’ button, this will display the KPI’s where employee has secured maximum score.
- Click on ‘Essay Evaluation’ button, this will generate a Questionnaire to be answered by the employee regarding his working in the organization. It’s a kind of feedback form for employee.
- Click on ‘Goals’ button, this will generate a form where employee can give his remarks/ career goals etc.
- Click on ‘Outcome’ button and this will generate the complete report regarding employee appraisal like KPI Score, MoB Score, MoB’s, Achievements etc.
Appraisal Method Setup:
Using this form admin can create and store Appraisal Methods library.
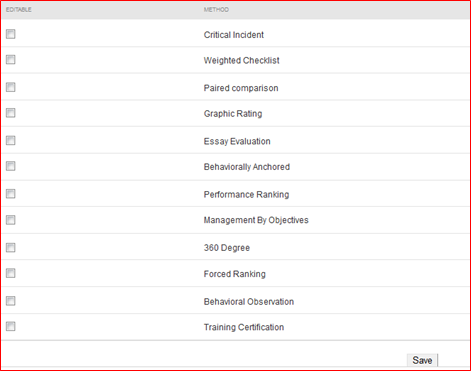
- All available methods of appraisal libraries will be displayed on this form and admin will check the desired library method he wants to apply on appraisal form setup.
- Admin will check and click on save button to set this library.
Appraisal Group:
Using this form appraisal admin will create and store appraisal group which will be displayed on appraisal template setup form.
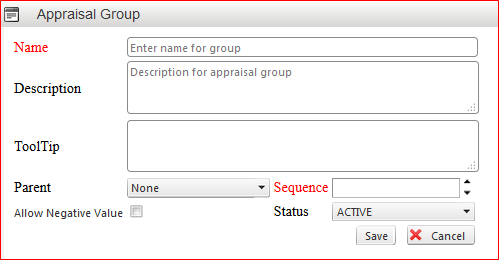
- Admin will enter the name of appraisal group in first text box and will enter the description of that group name.
- If admin want to give any tool tip notification than its description he will enter here in Tool Tip text box.
- Now, admin will select the Parent group name under which that new created group will fall into from the drop down menu.
- Admin will define the display sequence of that newly created appraisal group.
- If admin want to set negative value also than he will check that and mark status as Active and finally will click on Save button to save the newly created appraisal group details.
Appraisal Questions:
Using this form admin can create and store Appraisal Questions Library which can be automatically called in appraisal form.
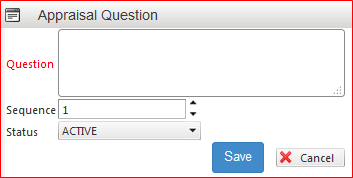
- Here, admin will enter the Question in given text box.
- Sequence of question and status will be selected as active and will click on save button to save this question. Saved question will be available in Appraisal form.
Appraisal Template:
This form will be used for setting up and to store Appraisal Template based on group of Employee Level.
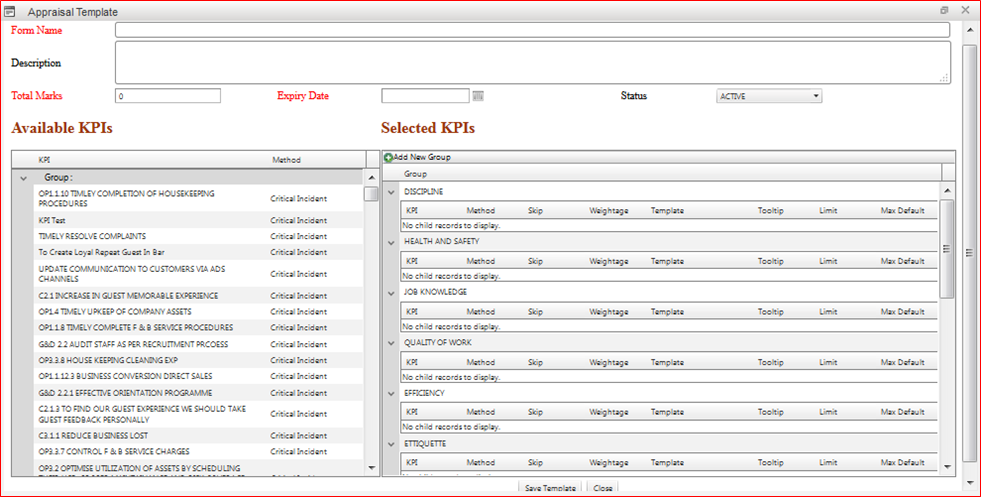
- Enter the Appraisal Template Form name.
- Enter the description in the given text box and enter the total marks for this appraisal template.
- Enter the expiry date of this template and make it Active by selecting from the drop down menu.
- On the same for all available KPI will be displayed at left side of form and admin need to select the KPI’s for this particular appraisal template to make that active.
- Click on ‘Save Template’ button to save this new appraisal template.
How to Use WorkSpace
WORKSPACE DOCUMENTATION
Introduction
WorkSpace is User’s individual space where user has got all his Tasks, complains, Assignments, list of Training's and Milestones to achieve. WorkSpace offers the following unique features which other management tools do not contain, these are:
Ticket Management – Complete complaint management solution starting from raising a ticket for follow up with concerned authority and finally closing it with the solution.
Meetings - Effective meeting solution, by making agenda clubbed with calendar and attached to strategy management.
Calendar – One can see two calendars at a time (Personal and Business linked to strategy Map. Easy to delegate tasks from your calendar to another user falling in same group.)
Milestones –Different benchmarks (Projects or tasks) have been set by the head of the company that everyone has to achieve, also one gets the appreciation if he achieve it on the given time.
a) Guide: Guide will give you the idea about the particular action item. It contains Title name, overview, what to do, how to do, purpose and achievable.
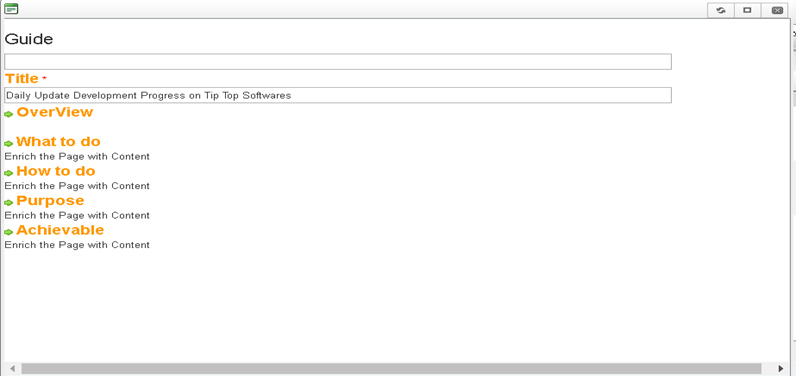
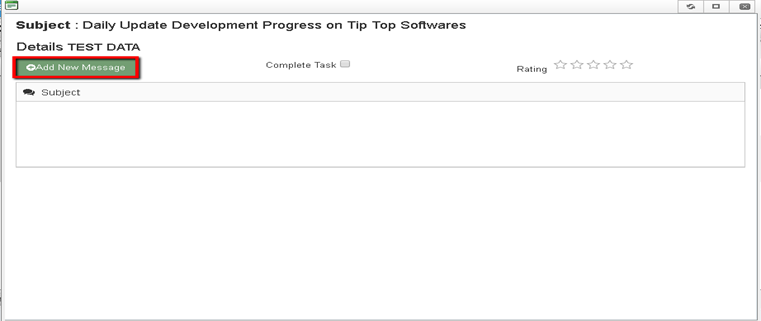
b) Discussion: If you would like to discuss about the particular action item you can simply forward it to the recipients by simply click on add new message
c) Help: As per name, help will give you the idea about the current action item.
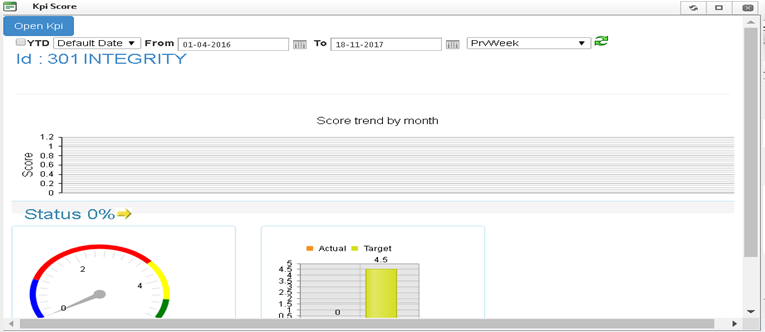
d) KPI Score: KPI score will give you the score of the person by validating different parameters set by the company and according to it one can measure the performance of respective user/employee within the organization.
e) Checklist: Checklist will help you to figure out what to do and what not
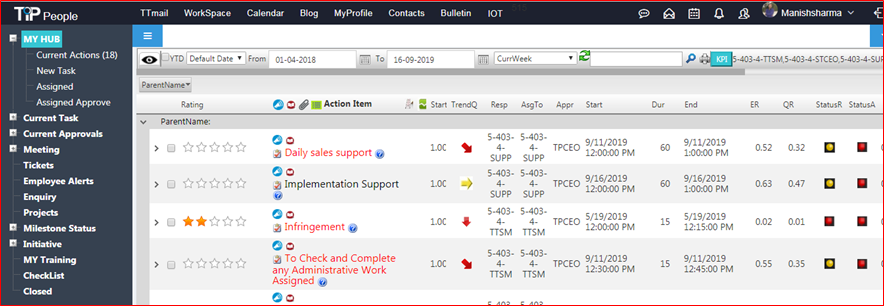
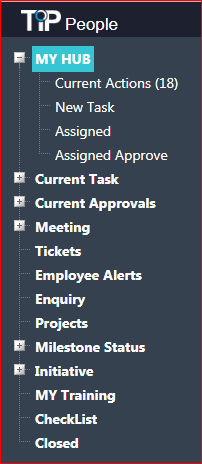
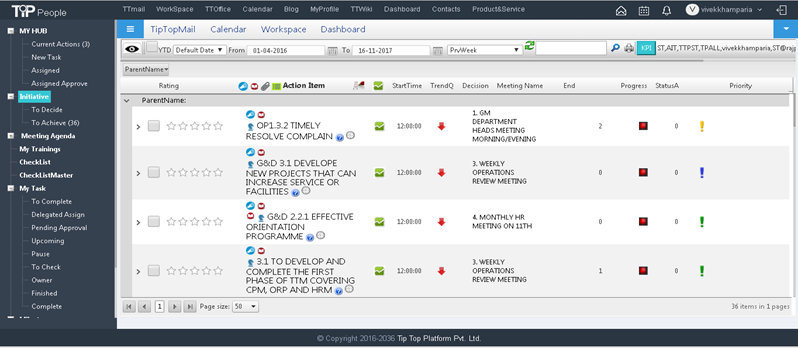
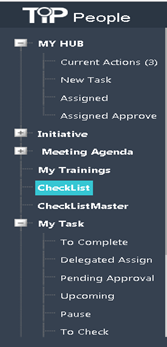
As the user clicks on Workspace, he can view his workSpace as shown below-
WorkSpace comprises of-
- My Hub
- Initiative
- Meeting Agenda
- My Training's
- Checklist
- Checklist Master
- My Task
- Milestones
- Approve
- Closed
Let’s analyze each tab individually here-
My Hub-
My Hub is a collection of the User’s Tasks, work he is supposed to do, assigning and approval of work.
On Expanding My Hub, the User gets to explore four areas those are-
1. Current Actions User can view his ongoing work and reply to conversations those are pending.
2. New Task- The user can open new task which he wishes to achieve.
3. Assigned- The user can view the tasks those are assigned to him.
4. Assigned Approve- This is where the user approves of certain roles those are given to him.
Current actions: Here, user can view his ongoing work and reply to conversations which are pending.
This is how the user can reply the message in current actions.
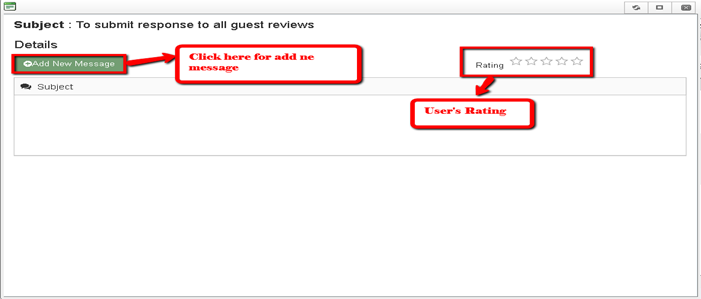
User has to click on add new message and then he can write the message by selecting participant. Also user can give rating from 1 to 5 according to the work done however if rating is below than 3, one form will open where user has to write the reason of bad rating and automatically that complain will get open again.
New task: One can see his/her open complains (Complains have to resolve) in the new task option, these complain raised by the user who has authority to forward it to the right person.
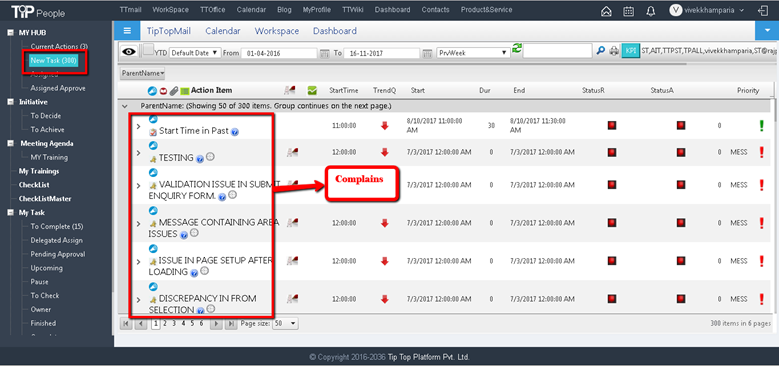
These are complains in the New task option however if one accept these then it will go automatically to complains section which is under milestones tab.
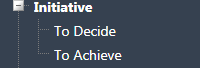
Initiative-
Initiative is when the User decides his possibilities of work, his capabilities and designs a Work plan to achieve these Goals.
Initiative consists of two things-
1. To Decide: The user decides as to what all he can do.
2. To Achieve: Once the user has decided as to what all possibilities he has got, he can then work out a strategy to achieve those goals.
Meeting Agenda
The user decides on a list of things those are to be discussed in a meeting in this particular section.
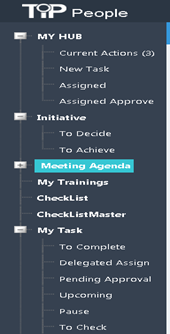
Meeting agenda consists of-
My Training-
The user can view all his Trainings which he wishes to participate in this tab.

My Training-
The user can view his Trainings under this tab
Checklist
Checklist lets the user to match his work with the To-do list he makes. He can check whether anything is missed out or not, some unfinished tasks which needs to be completed.
Checklist Master
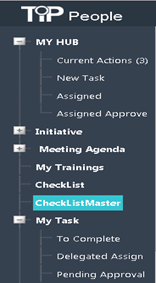
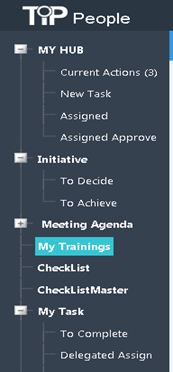
My Task-
This tab specifies the user’s task and has various sub-categories in it.
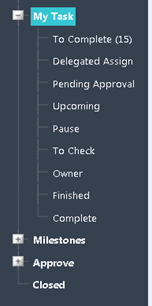
My Task consists of-
1. To Complete- Tasks which are pending to be completed can be viewed here.
2. Delegated Assign- The task which assigned to some other person on behalf of other, in other words task assign to the back up of the person who is not present.
3. Pending Approval- Task’s which the user has done, but awaiting approval.
4. Upcoming- Future Tasks.
5. Pause- Tasks which has paused as they aren't important right now but will be doing in the future.
6. To Check- These are the tasks which display the Checklist Items.
7. Owner- Owner has the rights to assign and approve the tasks.
8. Finished- Work which the user has finished.
9. Complete- Task does complete comes in this category.
Milestones
As we know Milestones are measurable and observable and serves the purpose of progress monitoring, the user can set his Milestones in this section.
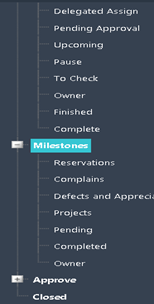
Milestones comprises of
1. Reservations- The user can check the Reservations from here, which was punched by using Submit Enquiry from Tiptop Mail.
2. Complains- User can review all complains raised by different persons that related to him and resolve it with the required action.
3. Defects & Appreciations- User can view his own achievements and defects.
4. Projects- All projects assigned to the user can be viewed here.
5. Pending- All the tickets which are pending for approval can be seen here.
6. Completed- Tasks which are completed appear here.
7. Owner- User can view his Ownership in various Projects.
Approve
The user can approve all the tasks assigned to him.
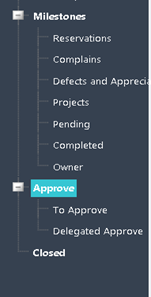
Sub-categories of Approve are-
1. To Approve- User has to approve the assigned or authorized to.
2. Delegated Approve- Some other person who took responsibility on behalf of you approving tasks.
Closed
Work which is completed from the User’s end will appear in Closed Tab.

How to use Checklist
How to Use Check List
Purpose:
To create, add and use checklist for completion of task aligned to company strategy.
Form Used:
- Checklist Maste
Purpose: All checklists are stored in this page and is a Master database of company checklists.
- Checklist Item Master
- Checklist Item name Master
Purpose: All checklists Item Name are stored in this page and a Master database of company checklists item name library.
- Checklist Template Master
- Checklist Category
- Checklist Sub Category
- Checklist Group
How to Do:
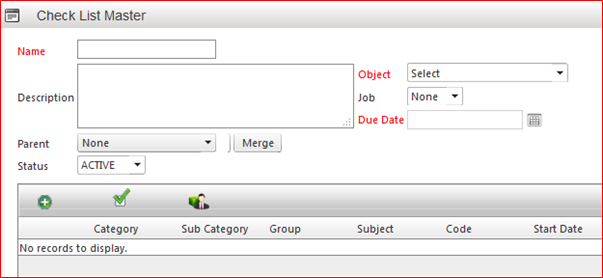
1. Go To Checklist Master Page:
and click on "+ Add New Checklist button" and fill below fields showing in figure-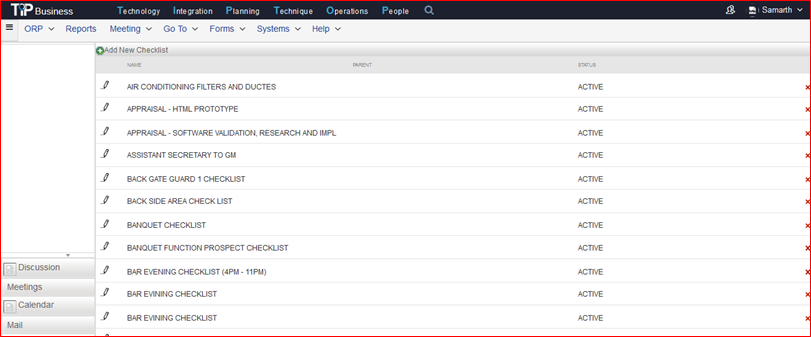
a) Name: Here, user has to provide a name to that particular Checklist.
b) Description: To add checklist description
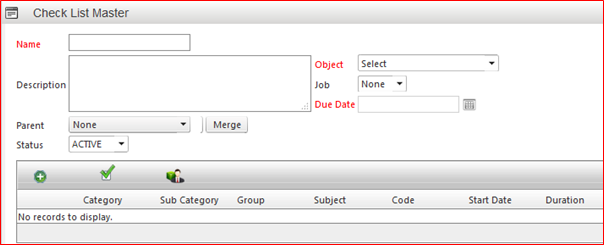
c) Parent: For Template Purpose. (Where user want to show and link this checklist particularly)
d) Object: Select item as per nature of checklist.
e) Status: Select Active.
f) Due date: Add the checklist due date for operation
2. Go to Checklist Item Name Master page and click on + Add New Checklist Item name button and fill below fields showing

a) Name: User enters the name of checklist item using this.
b) Description: To add any detail description about checklist item name
c) Specification: To add any detail specification about checklist item name
d) Checklist category: Select category as per nature of checklist.
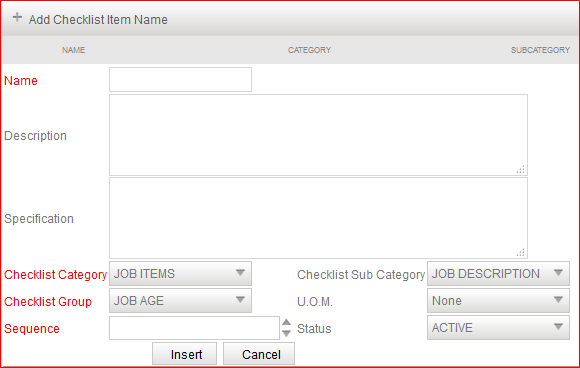
e) Checklist Sub category: Select sub category as per nature of checklist
f) Checklist group: Select group to separate grouping checklist work
g) UOM: Select unit of measurement for eg. Number
h) Sequence: To add sequence in checklist name.
i) Status: select Active
3. Go To Checklist Item Master page and click on + Add New Checklist Item button and fill below fields showing

a) Select Category: Select category as per nature of checklist for eg: Work Item selected
b) Select Sub Category: Select sub category as per nature of checklist
c) Select Group: Select group to separate grouping checklist work
d) Name : List of all name List display created under group
e) Department: select Department
f) Owner : select Owner
g) Location category : select Indoor or outdoor
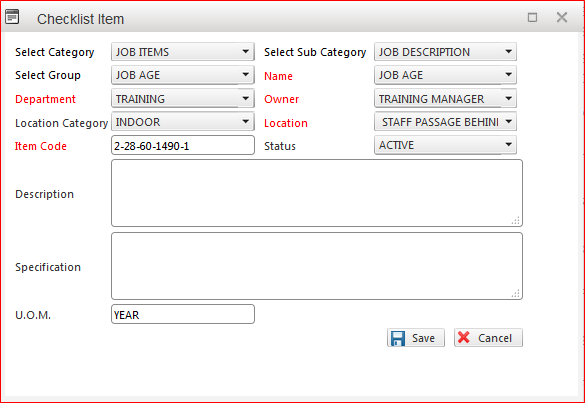
h) Location : Select the location from drop down
i) Item Code: Automatic generated by System.
j) Status : Active
j) Description : To add any detail description about checklist item name
k) Specification : To add any detail specification about checklist item name
k) UOM Select unit of measurement for eg. Number
l) Save
m) Cancel
4. Go back to Checklist master Form to add Checklist Item and resource in checklist.
5. To add Checklist Item and resource.
Showing 2 tab for adding ; general i.e. Checklist Item and Resource
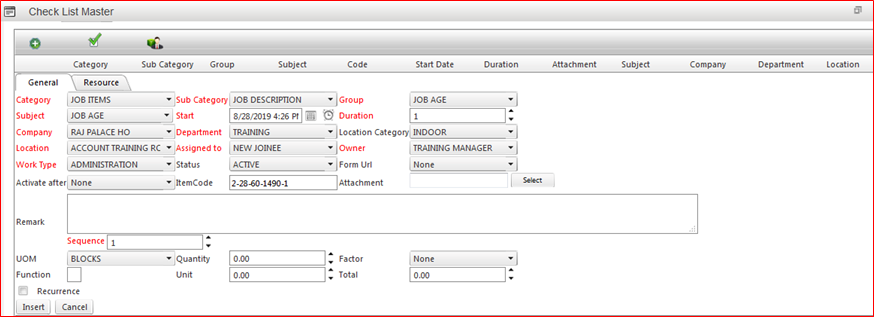
- Select category Select category as per nature of checklist for eg: Work Item selected
- Select Sub category Select sub category as per nature of checklist
- Select group Select group to separate grouping checklist work
- Name : List of all name List display created under group
- Department: select Department
- Owner : Select Owner
- Location Category : select Indoor or outdoor
- Location : Select Location from drop down
- Assigned To – select title user who will perform this work
- Owner – select work owner
- Status – Active
- Form URL – any url add in checklist
- Activate After
- Item Code – Generated by system
- Attachment – any document to attached
- Remarks - For adding any remarks
- UOM – Select Number
- Quantity – Select 1
- Factor – Select factor None, selection for work item which affect any one in list
- Recurrence – Apply recurrence – For eg: Daily
- Insert - Button use to insert above data
- Update – button use to update above data
- Cancel – button use to cancel data
6. Add Resource Item in Checklist work Item.
Image showing Resource tab for adding resource Item in checklist.
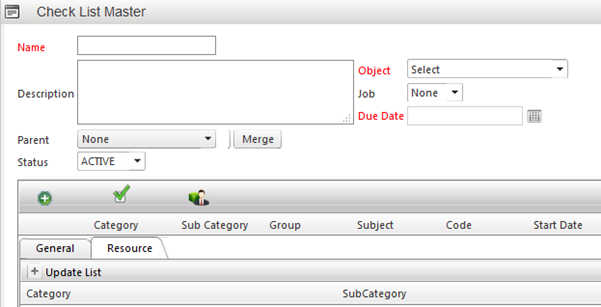
Click on + Update List for adding Resource Item
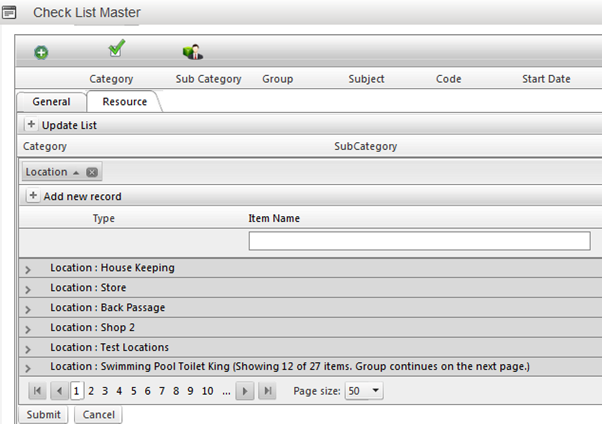
Select resource item by tick check box preceding resource item
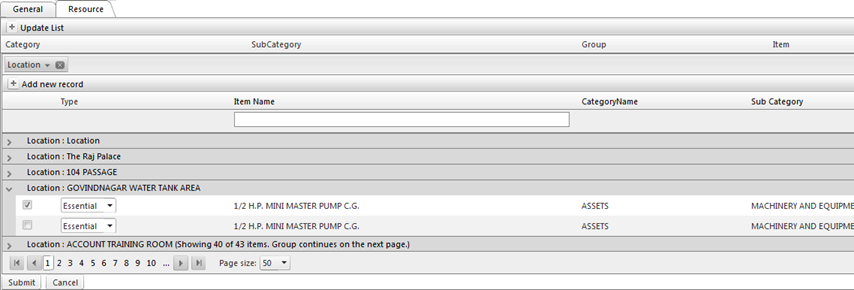
Update selected resource list
Image showing resource list selected from location

7. Click on Submit button, bottom left of form to add the selected resource item in checklist.
8. Go To tab general and then select Update to add resource item and general item in checklist.
9. Then Select Update Bottom Right button to update checklist.
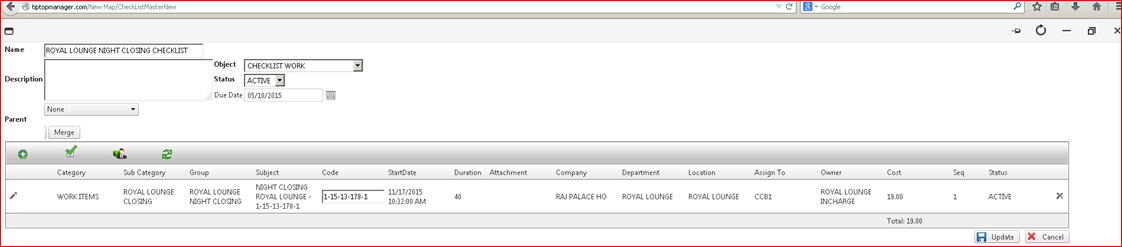
10. To link checklist with task.
Note: Only task owner can edit and update checklist in task.
Go to WorkSpace and go to owner Page in task form.
Image showing task form where checklist is added
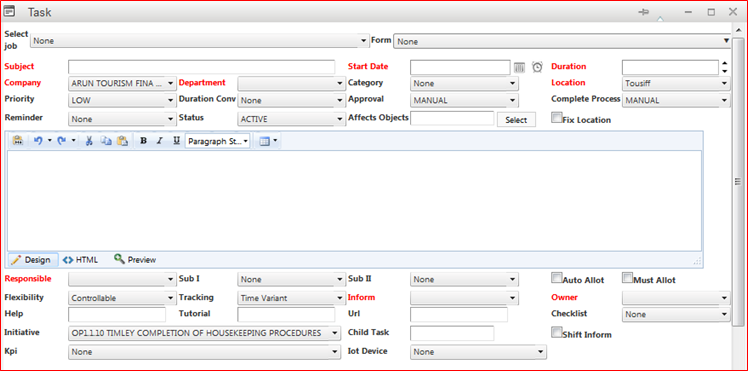
Image Showing task Form is saving having checklist added.
How To Use Ticket Management
How To Use Ticket Management
Ticketing system that makes customer service easier and cost effective
Customers reach out to you every day, with multiple questions about your products. Using support ticket software is essential to keep track of all these requests, resolve them, and leave the customers happy with your service. With Tip Top’s Ticketing Tool, you can breeze through all of it with time to spare.
- Keep track of conversations
- Increase your team’s productivity
- Help customers help themselves
- Support across channels
- Resolve issues together
- Measure and improve efficiency
- Meet SLA's on time, Guarantee End-User Satisfaction
- Solve IT Incidents Faster, Enhance Service Quality with the Knowledge Base
- Prioritize and Organize Tasks and activities
- Automate Repetitive Tasks
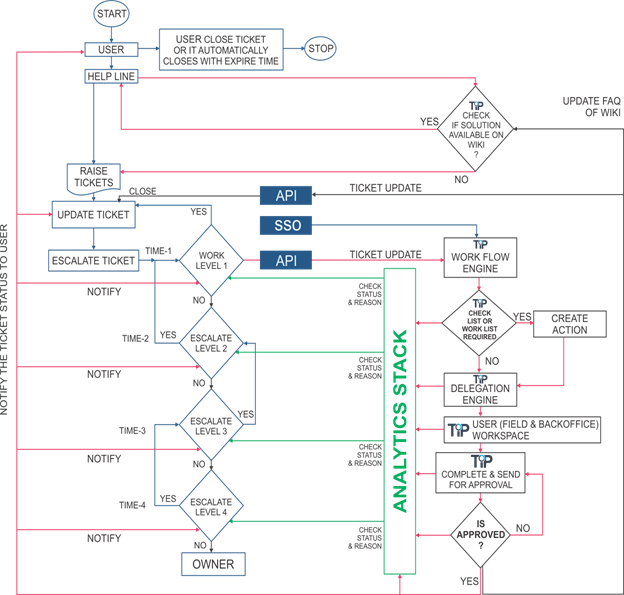
Tip Top Ticket management application enables you to manage Ticket life-cycle from Ticket initiation, assignment to closure in a very simple way.
TTT allows you to create a unified, closed-loop Ticket management system for tracking Tickets across processes, departments, and geographical locations and by automating all Ticket-related tasks, such as data collection, notification, follow-up, and escalation based on RACI.
Tip Top’s Ticket Management System integrates all the tools necessary to ensure prompt and seamless resolution of customer inquiries. The more you automate, the more your service reps can focus on what is important – creating exceptional customer relationships.
Our help desk ticketing system enables you to automate processes that are best managed through system driven resources, so your service team can focus on engaging customers and helping them get the most out of your product.
Functionalities in TT Ticketing System
- Email Integration
- Ticket Automation & Workflows
- Customizable Ticket Page
- Custom Fields, Statuses & Properties
- Ticket allocation and role distribution (Department Linking)
- Authorities and Responsibility mapping
- Organization Strategy Linking
- Resolution Time Set Up
- Communication & Alert setup
- Ticket Notification
- Escalation Mechanism
- Performance and Rating Reviews mechanism
-Tip Top’s Ticket Management System Work Flow:
Ticket Setup (Set help desk standards)
Scope:
- Design and define help desk objectives or Organization Strategy to meet business goals.
- Meet customer expectations with single or multiple SLA's
- Measure help desk performance with time tracking
- Create Custom views for support reps
- Customize ticket forms and templates as per strategy plans
- Customize Ticket Forms to suit business needs
- Assign and set Department and role for ticket Resolution
- Add and allocate roles and responsibilities within the department to resolve the ticket and to have more eyes on the customer
Steps:
2. Click on Add New Complaint Type option item.
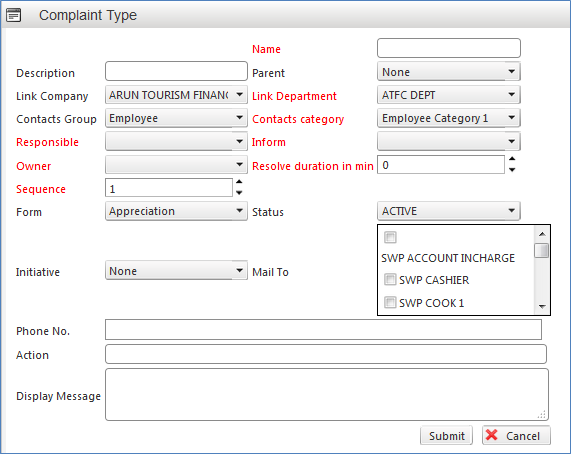
3. Enter the name of Complaint type
4. Enter the description about complaint type if any
5. Select the Parent of particular type of complaint from drop down like this particular complaint falls under which menu item or module
6. Select the company from drop down under which this complaint belongs or created
7. Select the Department for which this complaint is to be linked with
2. Click on Add New Complaint Type option item.
8. Select the Group of contacts responsible for that complaint like employees, suppliers, customers etc.
2. Click on Add New Complaint Type option item.
9. Select the Responsible person from drop down who is responsible to handle or to attend that complaint/ to resolve that complaint.
10. Select the Inform: Inform is the person who has to be informed or intimated for the resolution of that complaint
11. Select the Complaint Owner from the list in drop down
12. Enter the time period to resolve that complaint
13. Select the Form name and make status as Active
14. Select the initiative as already defined which belongs and linked with this particular complaint type
15. Select and check the designation to which complaints mail or resolution’s mail has to be sent from the drop down menu.
16. Enter Phone Number, Display message or Action in the provided test box
17. Click on Submit button to save this complaint type.
Utility of Complaint/ Ticketing Module:
Complaints posted by users will be notified to responsible/ Group through TT WorkSpace- Tickets.
E Mail & Message’ integration of Tickets (Ticket Message Receive By Responsible User/ Group)
- Manage multiple mailboxes in one place containing the raised ticket/complaints
- Bring conversations from multiple email addresses into a single help desk for faster resolution.
- Route tickets to the team best equipped to handle them using smart ticket assignment features.

Complaint Escalation Mechanism
Ticket Can be handle by individual or Group With Escalation Mechanism with help of message and Forward Functionality.
Ticket Forwarded From One User to Another with Communication on Action Messages Thread and Finally Resolved and Completed from User WorkSpace
Approver User – Check Quality of Ticket resolution and Give Rating.
And Complete Ticket
Steps:
1. Right click on complaint and user will get the option as Edit, Forward To and Close options.

2. Click on Edit button to ‘Edit’ the posted complaint
3. User can edit the complaint and resubmit the same. (Same page/form to register the complaint)
4. Click on ‘Forward To’ option.
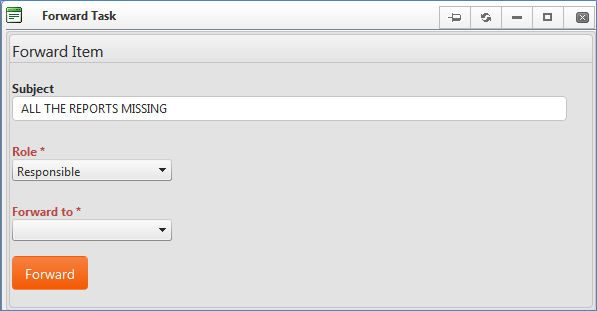
5. In Subject line the concerned Complaint will be displayed
6. Select the Role from drop down to who that complaint is going to be forwarded to like Responsible, Inform or to Assign.
7. Based on Selected Role: ‘Forward To’ will displace the concerned designation/ employee or role that is going to receive that complaint.
8. Click on Forward button to forward that complaint to other authority.
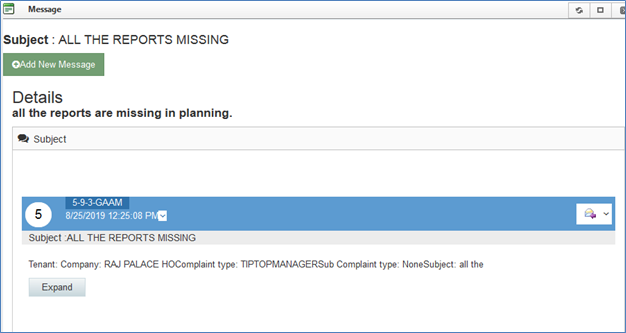
9. Once forwarded the same complain twill be displayed in concern person’s workSpace.
10. Click on particular complaint from workSpace
11. This will open message window from where remarks or resolution can be send to group or owner or to Inform.
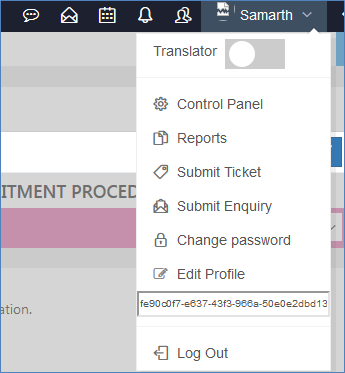
Submit Complaint/ Submit Ticket:
To submit ticket/ complaint there is an option provided in all TT applications under User name Tab as “Submit Ticket”
Click on Submit ticket option and the form for submitting complaint will be displayed
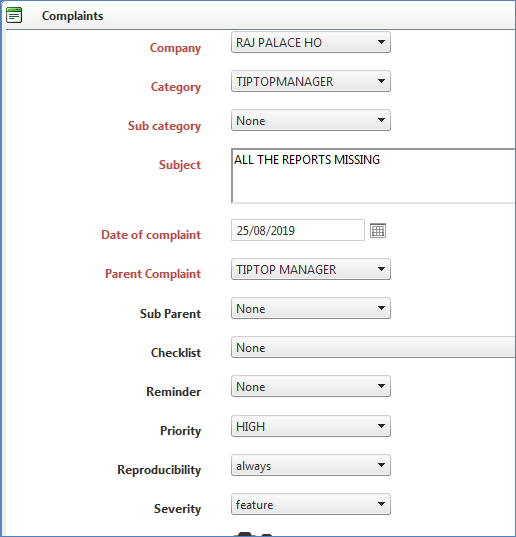
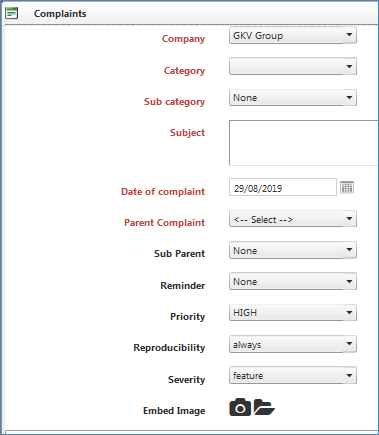
Steps:
1. Select the Company for which user want to submit the complaint for from the drop down menu.
2. Select the category of complaint from drop down menu.
3. Based on Selected Category- Sub category will be displayed in next drop down (sub category): Select the sub category from drop down menu
4. Enter the Subject line for complaint.
5. Enter the Date of Complaint
6. Select the parent name of complaint (parent name which was created in complaint master form)
7. Select sub parent from drop down menu
8. Enter Reminder time if user want to set reminder for particular complaint to receiver
9. Set the priority of submitted complaint as High, Medium or Low.
10. Select the reproducibility of that complaint as Always, sometime, random time etc.
11. If user wants to attach some screenshot or image explaining the occurrence of that complaint than Embed Image option is there using this image can be attached with complaint.
12. There is any editor too on the complaint page where user can describe the issue relating to that complaint
13. Click on Submit button to save and post that complaint.
How to use Hand Over plugin
Hanover and Take over is basically a tool for majoring Responsibility management and Transfer
Handover:
This form is used to transfer of department charge (Handover & Takeover of department charge) Form define important information for both successor and predecessor.

- For employee motivation at the time of handover, person who is transferring his duty to takeover employee, there is an option to select the memorable story from the drop down which is already saved on Guide page.
- Once the department is selected, a tag will populate on the screen which will display the current status of hand over and take over within that department. It will show that particular department’s handover is with which employee and who is going to take over that along with the date and time to transfer the handover/ takeover activity.
- Select the name of employee who is going to take over the charge now from (responsible employee name will automatically be displayed there in drop down menu)
- Now, both the handover and take over employees needs to enter their passwords there and click on Submit button to finish the handover/ takeover process.
Pending Complaints/ Pending Tasks:
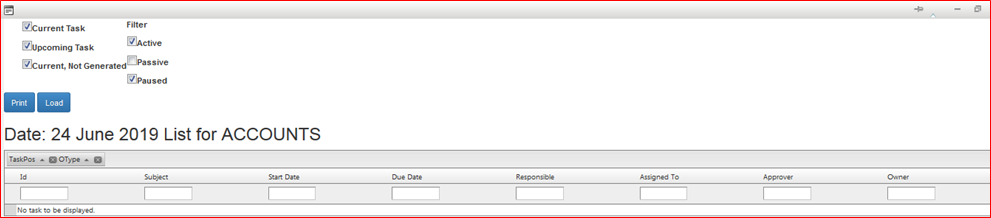
- During the time of Handover/ take over this form will display the pending complaints related to that department, so that take over employee will come to know the exact status of complaints pending at that time which needs to be addressed.
- Searching/Sorting option is available on that form to sort the pending tasks, upcoming tasks, current or not yet generated tasks, active or passive tasks etc.
- This Form will also show the task start date, end date, due date, responsible employee name, approver or owner etc.
Insert/ Update Attendance Entries:
- Using this option authorized person can insert or update its department’s employees grooming and ranking too. Attendance can also be updated using this form option if employee within that department has not marked their own attendance.
How to use CPM
Concept Behind 'CPM' Module:
Everyone in the organization is automatically linked to the strategy Map so everyone understands the goals and their role in that plan and the benefits that would come related to them. We are able to include employee latent and aspirational needs gather information from appraisal questionnaire and using AI to help in succession planning. Thus changing an employee individual goals to team goals and further team goals to organizational goals - the thinking shifts from forcing employees to managing employees. The CPM module has a strong activity engine that helps in delegating a plan to actions and simultaneously creating score for KRA and KPI. Once all the strategic planning has been made, the plan has to be executed which is done by people. Hence, the company requires people to work to accomplish the goals. To get the people, the company needs to segregate these work requirements on the basis of different Tasks , Functions and Responsibilities so that it can find the right person to do the right work based on the required competencies which may be educational, experience, skills, endurance, etc. The CPM provides a Utility based Business planning engine that helps create Mission statements broken into objective statements followed by measurable strategic Plans.Create Strategy:
Once organization titles are created then strategy can be created and planned down with Goal, Objectives, Initiatives and Tasks.
Organizational Goals will be defined here initially and based on those goals Objectives will be created I order to achieve those goals. Further to that Objective will be divided into Initiatives than Task; Milestone will be created to achieve those initiatives. Objectives could be grouped by perspectives itself.
- On initial screen this will give the company name for which goals, objectives need to define.

- Right click on company name and Select the option from the list.
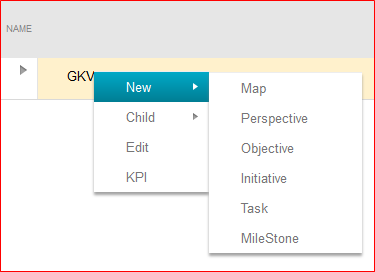
- Click on New- Map option to create a new strategy map.
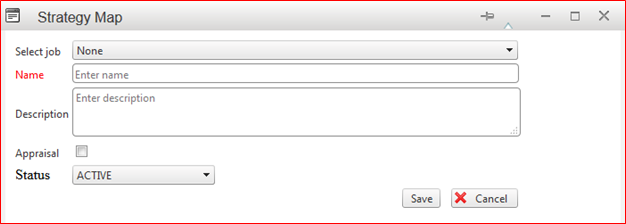
- Select the job from the drop down menu item. (this will come from guide page of job if created already there)
- Enter the Name of Strategy Map user wish to enter.
- Enter the description regarding that Strategy Map.
- If that strategy is linked with Appraisal Form, check this option.
- Select the status as ‘Active’ and click on ‘Save’ button to save this strategy map.
Create Perspective:
- Click on New- Perspective option to create a new perspective under any Strategy Map.
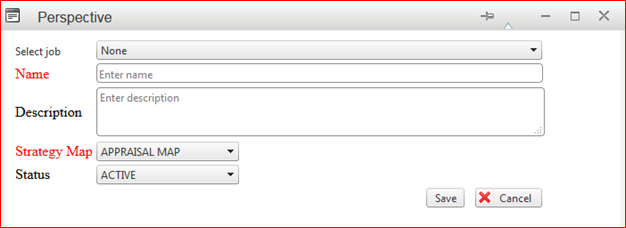
- Select the Job from the drop down list (this will come from guide page of job if created already there)
- Enter the name of Perspective along with its description.
- Select the strategy map under which this perspective come or relates.
- Mark the status as ‘Active’ and click on save button to save this record.
Create Objective:
This form is used to create particular objective based on organizational Goals.
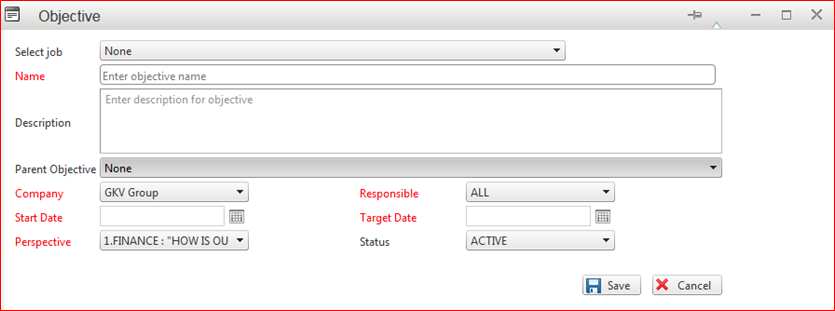
- Select the job from the drop down menu.
- Enter the Objective Name and its description. Select the Parent objective if created already, otherwise leave it blank.
- Select the company for which this objective is created from the drop down.
- Define Start Date of this objective and define Target date too.
- Select the Responsible name from the drop down menu. (responsible designation will be displayed in the drop down and here need to select the responsible designation for that particular objective)
- Select the Perspective from the drop down under which this so created object falls.
- Select ‘Active’ as status and click on ‘Save’ button to save this objective into record.
Define Initiatives:
This form is used to define initiative against any particular Objective as defined for specific goal of organization.
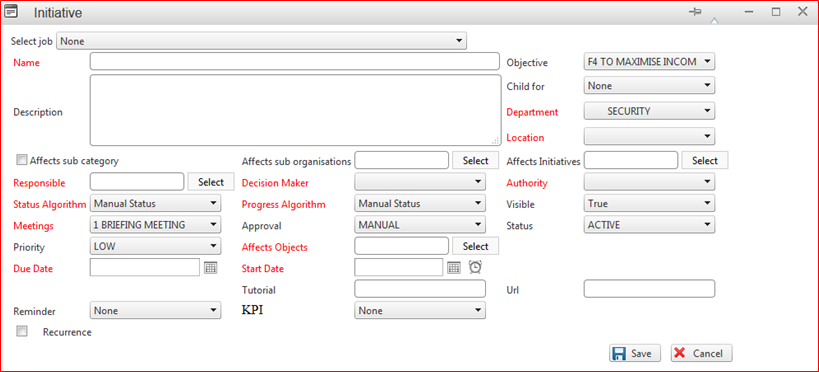
- Select the job from drop down menu item.
- Enter the name and description of Initiative to create.
- Select the Objective under which this initiative comes including Child objective if created earlier.
- Select the department this initiative belongs to.
- Select the location of that department from the drop down menu.
- Select the responsible title (virtual designation) from the given drop down menu; Select the Decision maker too from the drop down menu.
- Select the Initiative if it affects to any particular initiative.
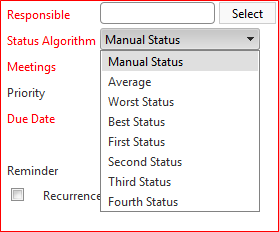
- Select the Status Algorithm from drop down like manual status, average status, worst status, best status, first or second status etc.
- Select the progress algorithm too from the drop down menu.
- Select the visibility as true or false, and also select the authority from the drop down menu.
- Select the Meeting from drop down if there is any particular meeting is already defined against this particular initiative.
- Select the approval method as Manual or automatic.
- Select the status as ‘Active’.
- Enter the priority and select the affected Objective from the drop down menu.
- Enter the Due date and Start date of this initiatives.
- Select the KPI from the drop down menu, by which this initiate is linked.
- Click on ‘Save’ button to save this Initiate.
Create Task:
Through this form Tasks can be created in order to achieve any initiative/ objective based on organizational goals.
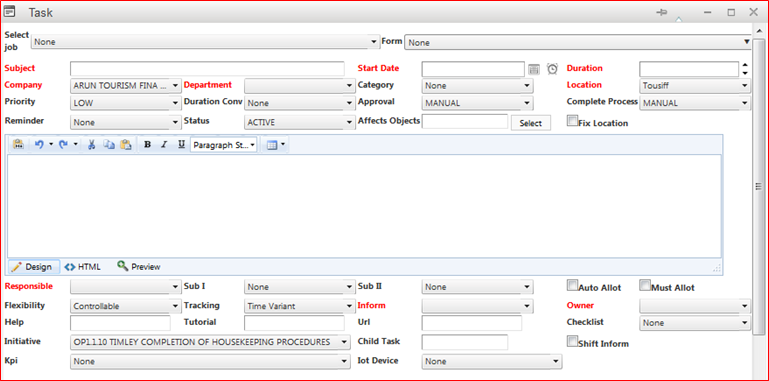
- Select the Job from drop down menu if create inside guide page.
- Select the form from drop down menu if that form is available inside guide page related to this task.
- Enter the Subject of task going to create. Also enter the start date for performing that task and the duration in days or hours.
- Select the company name from drop down menu under which this task falls; Select the department, category and location from the drop down menu.
- Set the priority as low/ high/ medium from drop down. Select the Approval method as manual or automatic and select the completion process of any task as manual or online.

- Set the remind if any, select the Status as ‘Active’ and if this affects any Objective than select the objective as already created from the drop down menu.
- Select the responsible Title (virtual designation) for that task from the drop down menu.
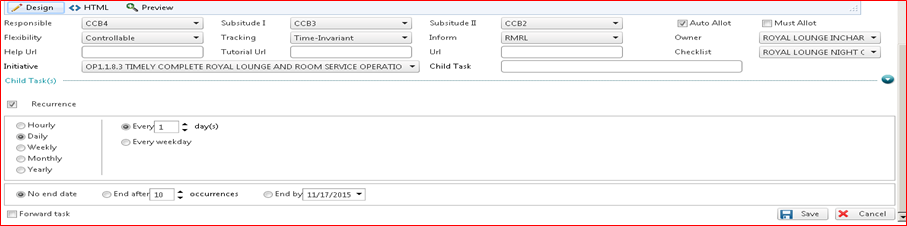
- Check if this task should be allotted automatically or select Must Allot option on form.
- Select the flexibility of that task as controllable or UN controllable.
- Select the Tracking option for particular task as Time variant or time in variant.
- Select the ‘Inform’ Title and Owner of that task from drop down menu.
- Enter Help, Tutorial or URL related to that task if available. Select Checklist from the drop down too.
- Select the initiatives and KPI from the drop down menu, Link this Task with any KPI to check the performance in appraisal.

- Later doing this, there is a list of available tasks and here, admin can select the particular task from the list to make child task.
- If this task is recurring task than check on recurrence option and if that task is allowed for forwarding than check on Forward Task option.
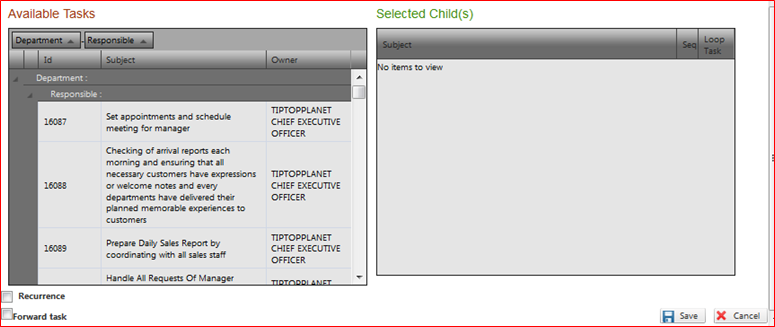
- Finally, click on ‘Save’ button to save this task.
Create Milestone:
Using this form Milestone can be created against particular KPI or Initiative decided as per organizational goals.
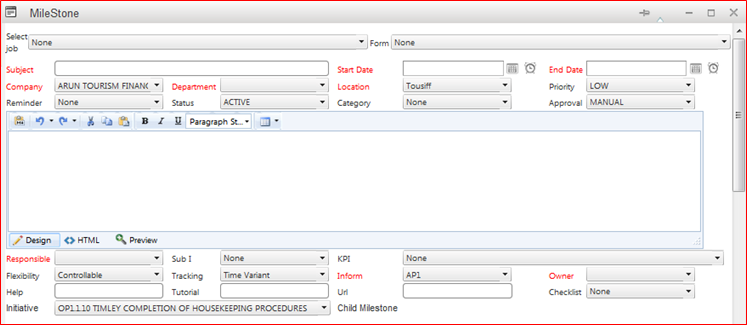
- Select the Job from drop down menu and Form name if available inside Guide page; this will come from the guide page.
- Enter the Subject of Milestone and enter the Start date and end date of project/ milestone.
- Select the company name, Department and Location from the drop down menu including priority of that milestone/ project.

- Set reminder, put the status as Active and select the category if any from the drop down.
- Select the approval method as Manual or Automatic.
- Select the responsible Title and KPI by which admin want to link this milestone.

- Select the Flexibility mode, tracking method, owner of that milestone.
- Enter the Help, Tutorial and URL if any related to that Milestone.
- Select the Initiative from drop down under which that particular milestone falls.
- Later doing this, there is a list of available tasks and here, admin can select the particular task from the list to make child task.
- Click on ‘Save’ button to save this milestone.

